Wednesday, December 24, 2008

We Have Sheep

The Sheep quilt top is finally finished!


I added 1/4 inch flange of yellow fabric between the inner blue and outer striped borders. I saw this on a blog somewhere but I can't remember where now. I actually considered (for about ten seconds) adding piping into this seam. But I didn't have the patience to make and apply it, so I went with the flange.


Check out the mitered corner on my outer border:

I'm so relieved to have this top completed.

Now I just need to find someone around here to quilt it for me!

Monday, December 22, 2008

The Year in Review

I decided to look back over 2008 and take a look at what I accomplished. Not counting projects that were started in 2007 and finished in 2008, I completed a total of 45 projects ranging from simple boxer shorts to smocked dresses, to a fitted cheongsam. That's an average of 3.75 projects per month. My most prolific months were the spring and summer months. I blame it on the longer days and the relaxed schedule, as well as the fact that, well, I'm just a warm weather gal.

Of the 45 completed projects, 10 were smocked outfits. My favorite smocked projects were:

T (Temily) 5


And Annika.


Seventeen projects were made for the Princess. My favorite was the Wall-E dress:


I just love the colors and the way the fabrics went together. The Princess's favorite project was Summertime Pink:


I think she liked the halter top.

Eight projects were made for the men in my life. I'd have to say my favorite is the Astronaut shirt:

The Prince agrees.

Eighteen of the 45 projects were for me. That's an average of one and a half projects per month! Not all of them were successes, but of them all my favorites were:

Kiwi:

I wore this a lot!

The leopard shirt:

This was surprisingly easy and fun to make and it's already getting a lot of wear.

The most challenging piece was definitely the cheongsam:


The challenge here was fit. I don't think this piece was 100% successful, but it was wearable and that, at least, is something.

I encourage you to look back over the past year and see what you got done. Like me, you may be pleasantly surprised at how much you actually got accomplished!

Monday, December 15, 2008

Let's Talk Resolutions

There are still a couple of weeks to go, but I have been thinking about New Year's Rsolutions, and I thought I'd share what's been on my mind. Normally, I don't make New Year's resolutions. I think that if you want to make a change or start something new you can do it anytime. Why wait for the New Year? But since 2009 is just around the corner (gosh, where did 2008 go?), I thought, why not just go for it this time?

So here, without further ado, are my 2009 sewing/crafting resolutions:
1. Reduce the fabric stash by two boxes.

I love my stash, but storage has become an issue, and the volume has just become unwieldy for me. I know I've previously blogged at least twice about losing fabric in my stash, and to me that is a sign that things have gotten out of control. Besides, I love buying new fabric and I can't justify bringing it home if there's nowhere to put it!
2. Dig out all UFO's (be honest about it), blog them (to keep me honest) and finish them!


This should help a little bit with Resolution #1.

3. Make at least one quilt.


More would be nice, but for resolution purposes one will do. This should also help with Res #1.
4. Make some wardrobe staples: plain blouses, skirts, jackets, etc.


This will pump up my work wardrobe and help reduce the stash.

5. Make more dresses for me.


I love the ease of wearing a dress. As with #4, this will help pad the wardrobe and reduce stash.

6. Make more dresses/outfits for the Princess.


She grows like a weed and I need to take advantage of being able to sew for her while she will still let me. Not to mention a huge chunk of the stash was purchased for just this purpose.
7. Graduate from scarves: Knit a sweater! Notice I just said "a sweater." I didn't say complicated, overly fitted, or multicolored. A stockinette shell will do, just something beyond a rectangle.
That's it. Actually, that's a lot! But, I have a whole year. Although if 2009 flashes by like 2008 did, I may be in trouble!

Sunday, December 14, 2008

Quilting on My Mind

Lately I've had quilting on my mind. Maybe because for the last week, I've been working on this:

This is my version of "Sheep in Dreamland" from the book, Wonderfully Whimsical Quilts by Carol Burniston. I blogged about this project before- in October of 2007! (It's been a UFO for over a year!!!) So it's time to wrap this baby up.

The sheep blocks are fused applique blocks alternated with the pieced pinwheel blocks. Here's what the sheep look like with their googly eyes sewn on:

I think they're cute. I am in the process of hand blanket stitching the sheep. I've got 11 blocks completed and I need to get 7 more done and then I can get to the fun part which is sewing them all together to make the quilt top.

In the background, you can see my first quilt ever.


It's a Double Irish Chain that I made back in 1990 while my husband was off in the Gulf War. The whole quilt uses only four fabrics, three prints for the top, and a solid black cotton for the backing and binding. I used the strip piecing method and it was super fast and easy.


The colors have faded over the years. This quilt has been washed and dried many times and spent a lot of time at the end of my bed or draped over a chair in the living room.


You can just barely see the paisley print in the black background fabric. Angie, recognize that green fabric?
I love lying under this quilt to read or watch TV. I've already had to mend the edge where the fabric had begun to split where the binding is sewn on. I hope it holds up for a long time yet.
Stay tuned for an update on the sheep quilt and on Winter Garden. I'n still plugging away on that project also. If only there were more hours in the day...

Sunday, December 7, 2008

It's a Wrap

The BWOF dress is done. (October 2008 issue, Dress 120)


From the magazine: "Tiny pleats at the neckline and in the skirt as well as a raised waist are the girlish attributes of this dress, yet the severe graphic print in cool colors makes it ideal for every woman."

I don't know that I'd call my print (a poly something print from Hancock Fabrics) severe or graphic, but it is rather sophisticated, at least in my opinion, and it worked well for this dress.

I like the overall style of this dress. It's easy and comfortable and it makes me feel kinda cute in a dressed up way. I haven't found just the right accessories for it yet, but it's just a matter of time.
I made a size 44. The only adjustments I made were to add 1/2" of width to the bottom of the sleeve, and I snugged up the side seams a total of 7/8" from the underbust seam down. After all, there's "loose and easy fitting" and then there's "shapeless and sack-like." I was going for the former. The fit seams pretty good. The shoulders and back do feel a bit snug, but since this is my first BWOF pattern in over 15 years, I don't know if it's because I chose the wrong size, or if it's just this particular pattern. I will need to try a couple more patterns before deciding. I really don't think I could have gone any larger in the bust. This fit me fine even without a FBA. And incidentally, I did make a muslin and it did not seem to be quite as snug. Hmm.
My favorite feature of the dress is the neckline pleats.

I also love that the neckline is modest, but not too severe. I chose not to use the facings that the pattern called for. Instead, I used bias binding cut from my fabric to finish the neckline. I cut a double width, folded it in half, stitched it to the dress, folded it to the inside and topstitched it down. It's almost unnoticeable, and it stays hidden. I was worried about the facing trying to roll to the outside, especially at center front.

One word of caution if you are thinking about making this dress: Check the length before you cut. I added 2 inches to the pattern piece for a hem and only ended up using 1 and 1/2. Although I think this dress would be really adorable in a shorter length- on someone else- I really wanted to be careful. I felt that the length I ended up making was just right. Short enough to be fun and fashionable, but not so short as to be unflattering or ridiculous. Okay, make it two words of caution. Make sure and use a fabric with plenty of drape. There are 6 pleats across the front of this dress and 6 across the back. A stiff fabric will definitely give you that "Mother to Be" look that so many of us are trying to avoid.

I'm going to give this pattern an A-. For now anyway. I'm going to have to wear it out and get a good feel for it before I decide if it's a favorite. I wore it to church this morning, but it was so cold I never even took my coat off, so it doesn't count. In any case, I'm glad this dress is done because I'm ready to move on to other things.

Like Winter Garden.

Saturday, December 6, 2008

Winter Garden

No picture of the BWOF dress yet. I hope to get it hemmed tonight and have pics tomorrow. (Crossing my fingers.)

Remember this?


I'm working on Winter Garden again. I hope to have it smocked before long. The Princess is in dire need of some new dresses since her last growth spurt and I really want to get this done soon.

I've got a lot of 3 step, half space trellis to go. I guess I better get to work!

Tuesday, December 2, 2008

Shannon Sews BWOF

It's been many years- and many sizes- since I've sewn a Burda pattern. The last time was in the early 90's when I lived in Germany and could buy the magazines at the local PX. I was about a size 36 back then.

Times have definitely changed. Today I'm living in Oklahoma, and I'm nowhere near that skinny anymore. But I'm giving BWOF a try again. I'm working on dress 120 from the October issue.

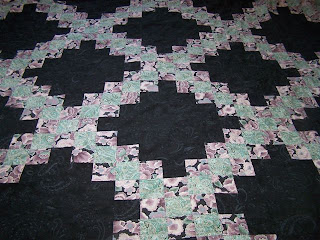
What first attracted me to this dress was the overall style: easy, breezy, and simple. (The fabric used in the magazine is pretty spiffy, too.) At first I thought this was a knit dress, but no, lo and behold, it's woven! Not that you couldn't use a knit if you wanted to.
However, the technical drawing turned me off somewhat.

It's rather boxy and boring. So I kept looking for a different project.

Then I saw this dress made up and reviewed on Pattern Review and I decided to take another look at it. Maybe simple and boxy doesn't have to be boring. I reminded myself that sometimes an easy fitting, comfortable, yet cute dress is a good thing to have. I can imagine this dress would be great on those days that I feel a little bloated and uncomfortable, or on days when I have to be on my feet a lot running around at work.

I'm seeing it in my mind's eye with black tights and some killer shoes. (Killer as in good looking- not crippling!) A bold necklace and maybe some chunky bracelets like the model is wearing in the magazine will set it off just right.

So off to the stash I went. I chose this drapey polyester print- gotta have drape to pull this look off.

Sorry about the dark photo.

I made a muslin- a size 44 straight out of the book. The fit was pretty good. The bust was even a bit roomy- without a FBA! It could be the nature of the design- easy fit and pleated at the neckline, but whatever. It works. And frankly, the pleats are my favorite feature of this design.

I felt that the sleeves were just a tad snug and the underbust seam just a smidge loose. So I added 1/2" of width to the sleeve and trimmed 1/4" from all the side seams. With those slight adjustments made, I cut my fabric.

So far I have the back darts sewn, all the pleats basted, and the bodice front sewn to the skirt front. I am so excited to see this come together. I think I'm going to go work on it right now! Stay tuned for an update soon.

Tuesday, November 25, 2008

There's a Reason I Don't Cook Much

I don't cook much because I just don't care for it. I'm not very good at it- probably because I don't do it often enough, and I especially hate cleaning up afterwards. I also tend to hurt myself.

Yes, I burned myself on the upper oven rack when I reached in to remove a tray of french fries from the bottom rack. Ouch.

On the other hand, don't I look good in my new top made from McCalls 5522? I'm looking so sharp no one will even notice that little 'ole burn on my wrist.

Here's the scoop:

I made a muslin of this top months (maybe even a year) ago. I tried it out because it was so similar to Butterick 4985, which I had tried and not been 100% pleased with. I still loved the look, and I thought I'd give the McCalls pattern a go because of the multi bust cup sizing- no FBA!!! The muslin fit great! So why did I let it languish so long before making it up for real? I don't know. Maybe because I have the attention span of a gnat and I got distracted by other projects? Or maybe because I had selected slippery poly satin for my fabric and I was too lazy/chicken to work with it? Maybe both?

Well, last week I decided it was time. I pulled out my fabric- this lovely blue leopard print poly satin (that sounds so tacky, and maybe it is, but I love it!) and the pattern pieces. Thank goodness I found them all together because I'd never put them back in the envelope after making the muslin! Shame on me!

Anywho. I was going to share details, right? I made view B, cutting a 14 through the shoulders (and the sleeve cuffs) and a 16 from the underarm down, using the D cup pieces. I usually morph to an 18 at the hip, but this top is a little short, in my opinion, and the size 16 muslin fit fine, so I decided not to worry about a wider hip. When I make it again, I may add an inch of length through the waist and I'll have to decide then whether to go wider at the bottom. The bottom half of the blouse is princess seamed, so it shouldn't be a big deal to add a little extra room at the hem.

I followed the instructions pretty much to a T except for the bust ruffles. The pattern indicated a 5/8" hem on the outer edges of the ruffles. I did a 1/8" narrow hem (On satin! I am so tickled with myself!) I just thought it would look nicer and give the ruffles a more RTW finish.


I went back and forth on the ruffles. When I first tried the top on (before the sleeves were attached) I got a bad "70's baby blue tuxedo" vibe. But after the top was finished, I decided I really like the ruffles.


The satin, an inexpensive find at Hancock Fabrics, was surprisingly easy to work with. I expected a real fight, but all I got was a need for a few extra pins. I worried about pin marks and marks left from gathering threads, but no problems there either. (Just to be safe, I tried to only pin in the seam allowances whenever possible- just in case.)

I'm so pleased with the finished top and the experience of making it that I've pulled out two other poly satins from stash: a purple stylised "zebra stripe", and an aqua "dot" print. Oh, and I have a solid apple green, too! I haven't chosen patterns for them yet. I want to try something a little different. But I will definitely make M5522 again! I love it! If you have it and haven't made it yet, go for it!

Tuesday, November 18, 2008

Baby Duro Strikes Again

During my days off I finished this:


McCalls 5458, or as I like to call it, Baby Duro. I used 100% quilting cotton that I'm pretty sure I picked up at Hobby Lobby last summer, and I made the size 6 once again. The Princess loves it- even more than the first one. It's a little big on her, but I hope that it will still fit this spring and that she can wear it with a tank top and capri leggings underneath.

Once the Baby Duro was done, I cut out a new project for me, McCalls 5522.


I'm making View B, the one pictured on the model. My fabric is a dark blue leopard print satin. So far so good. I am in the process of attaching the sleeves and once those are on, all I will have left to do is add buttons and button holes. Unfortunately I don't have any suitable buttons in my limited button stash, so I will make a run to the local Walmart tomorrow to see if by some miracle, they have something that will work. (I'm not holding my breath.) I'm afraid it may be this weekend before I can get to a fabric store to find just the right buttons to finish this project up. I will not be idle, though. I've already picked out New Look 6647 as my next project:


I'll be making the short sleeve version with contrast trim (shown in black and white.) I hope to cut out the pattern pieces and make the FBA tonight. Stay tuned for progress reports later this week!

Sunday, November 16, 2008

Frogs in Space!

Finally! Here it is, Frogs in Space!


Made from Simplicity 2836, the HSM shirt, this is the latest shirt for my little man, Bryan. Once again, I omitted the pockets and let the novelty print take center stage. I love it, and he does, too, so it's a success.


There hasn't been a lot of sewing going on the last couple of weeks. I've just finished up a huge project at work and I've taken a couple of days off to relax, so I hope to have a few things made and posted here in the next week. One thing that's been speaking to me is this fabric:


I'm thinking a dressy blouse to be worn with a high-waisted skirt in red. The problem is that I haven't yet picked out a pattern, and I don't have a red skirt. I don't even have any red fabric in my stash to make a skirt. But I do have this and I'm sure it would look fine with black or grey, too. While I'm mulling this over, I've already cut out a new Baby Duro for the Princess. I plan to start stitching that up this afternoon.

So with that, I'm off for a nice relaxing afternoon with my sewing machine.
Later!

Sunday, November 2, 2008

Flappy Halloween

The Flapper Dress:


Yes, I actually wore this get-up to work on Friday. I got compliments, though. My co-workers seemed to like it well enough. A lady at the grocery store even told me I looked pretty authentic. I doubt she was around in the '20s though, so I'm going to take that with a grain of salt.
Anyway, on to the the sewing specs. I started with Simplicity 5190, a long OOP pattern for a very slight A-line dress with a V-neck and flutter sleeves. It's no longer available on the website, and I'm too lazy to scan it right now. It was designed for wovens cut on the bias, but I decided to go with this black knit with gold shimmer. I added one inch of length across the bust and eased the extra inch in at the side seams. To make it a "flapper" dress, I stitched three tiers of 4" chain fringe around the bottom. That's a total of about 5 yards of fringe, and guess what- it's heavy. I think it actually pulls the dress down about an inch, maybe an inch and a half. Oh, well, it's a Halloween costume, not a dress for everyday. In any case, I love the fringe! I noticed I had a little swing in my step all day and I just love the look and feel of all that fringe swishing around my knees! You can't really see it in the photo, but I topped off the top tier of fringe with a strip of holographic gold sequins to cover the header. I also added sequins around the V-neck and along the edges of the flutter sleeves. I completed the ensemble with black fishnet stockings, black T-strap shoes, a feather boa, beaded choker, and a headband made out of black ribbon embroidered with gold beads and thread.
Thankfully Halloween is over and I can get back to sewing "real" clothes. I had about a yard of the black and gold knit left over and I cut out Simplicity 4076, the scoopneck version with neckline gathers. We'll see how it turns out.

Saturday, October 25, 2008

Mama Gets Her New Dress

Long time no blogging. But there has been sewing. Vogue 8178 is done:


As mentioned in my previous post, I cut a 16 from the waist up, and an 18 from the waist down. The muslin fit just right, but the finished dress turned out rather loose. I can only assume that my fabric, a mid-weight denim with a lot of crosswise stretch, either relaxed or grew during construction. I'm hoping that once the dress goes through the washer and dryer, it will draw up a little bit. It's fine the way it is, and definitely comfy, but I wanted a more fitted dress.


Anyway. I LOVE this pattern! It's labeled "Very Easy Vogue" and it is. It's also very stylish and work appropriate. I love this high waisted style and I am very happy with the way it turned out. I also love the wide lapels. The V-neck and the wide collar really frame the face and bring attention right where I want it. I also like that you can control the depth of the V by where you turn the collar back. Even with the collar open all the way, though, I felt perfectly modest and covered up.


I mentioned in my previous post that I chose not to do a FBA. The stretch in the fabric more than compensated for it. What I did do, though, was trim a tiny bit of length off of the back. I noticed on the muslin that, even though I liked where the under bust seam hit me, when I turned to the side, the front seam was higher than the back. I did not want to lengthen the front because I was afraid of messing up the proportion of the lapels, so I decided to even out the seam by shaving 1/4" off of the bottom of the back pieces tapering to nothing at the side seams. Sort of like the opposite of a FBA. It seems to have worked just fine.


I also added 1" of length through the waist to compensate for my long body, and 2" of length below the hips as extra insurance that the dress would hit me at the right spot with plenty left to turn up for the hem. I probably could have gotten away with only 1" to 1.5".


The sleeves on the muslin were tight through the bicep so I added 3/4" to the width. I had to add it consistently all the way to the bottom of the sleeve because the construction requires an almost square sleeve. I wish I had left it as it was. I think the stretch in the fabric would have compensated and as it turned out, the sleeves feel a little big, especially at the cuff. Oh well. Live and learn.


As mentioned in the previous post, I omitted the bodice lining except for the front pieces. This allowed me to significantly cut down on bulk, especially at the waist seam. I used facings in the back which I finished with my serger. This allowed me to cover the top part of the zipper and finish the back of the dress nicely. I also used a centered zipper rather than an invisible zip because I was afraid I wouldn't be able to make the invisible zip work at the waist seam. A bulky seam makes the zipper hard to open and close.
I will definitely make this dress again. I'd like to try it with a contrast color for the lining. Imagine a chocolate brown linen dress with pink lapels and topstitching. Or imagine a dark skirt with a contrast color for the bodice. I think this pattern has a lot of possibilities. One thing that disappointed me about this dress was that the topstitching doesn't really show up on the dark, patterned denim. I'd like to make this again and really showcase the topstitching. I think the sleeveless dress is really cute, too, and would make a nice spring outfit.
Now that this project is done, it's on to my Halloween costume. Stay tuned for a report on my flapper dress.

Sunday, October 12, 2008

Mama Needs a New Dress

It seems like I've been doing quite a bit of sewing for my kids lately, and while it's a lot of fun, I've been wanting to get back to sewing for me. The first project (as previewed in a recent post) is Vogue 8187.

This is an OOP pattern that I've had in my stash for quite a while. I've taken it out and thought about making it up from time to time, but I just never quite got around to it. The Pattern from Stash contest over on Pattern Review got me thinking about it again, and then this pushed me over the edge:
This is Vogue 8532, from the most recent crop of new Vogue patterns. I'm sure you can see the similarities. This high waisted look is a good one for me. It works well on my long torso and helps to give me the illusion of longer legs. The new pattern, however, with it's wide, low neckline, is more of a "going out" dress. I don't really need one of those right now. But the older pattern is a good choice for a work dress, and I can always use one of those.

I'm making the blue version with the sleeves. I cut a 16 from the waist up and an 18 from the waist down, and made a muslin to check it out. I was thrilled to find that the fit was pretty good right out of the envelope! Even without an FBA!

I had never seen bodice pieces quite like this. The side front piece (#2) has almost an angle to the bust curve. I'm used to a much more gently curved side front. But check out that huge "dart" (the empty triangular area between the two pieces). I decided to go ahead and try it without the FBA, and it fit pretty well. The length over the bust was perfect- the underbust seam hit me at just the right spot. I could have used just a smidge more width, but I didn't want to do a princess FBA, because I didn't want to add any length to the front. I was really afraid that would throw off the lapels.

Fortunately, my fabric (which you can see underneath the pattern pieces) has quite a bit of crosswise stretch. I'm counting on that to compensate for the minimal width adjustment I could have made but didn't. Unfortunately, however, my fabric is a tad heavy. It's denim, after all. I was really worried about bulk, especially at the waist seam in back. The pattern calls for basting the bodice and lining together and handling it as one when installing the zipper. Not only is bulk a potential problem, but that just isn't a really nice way to handle a zipper.

I had originally planned to use the same fabric for the lining as for the dress. (You have to for the center front pieces because the lining will show when the lapels are flipped out.) But Fate stepped in: I didn't have enough! My first thought was to use a different fabric- a solid cotton or broadcloth- for the rest of the lining. But I was afraid that would negate the stretch factor I was counting on. So I decided to eliminate the lining- except for the center front pieces, and go with facings in the back.

Normally, I would never change a pattern to add facings. I hate them. I much prefer a lining. But in this case, I think facings are the answer. Not only do they solve the problem of not enough fabric, but they will eliminate some of the bulk at the waist seam, making the zipper much easier to install, and using a facing will make it possible to finish off the top of the zipper much more nicely.

I'm off now to work on the dress. Stay tuned for more info about some other adjustments I had to make, and of course, for a photo of the finished dress!