
The top is #127 from the plus section of the July 2015 issue. I was intrigued by the loose, relaxed fit, the center front seam, and the split hemline. The top was shown in the magazine with flared pants, but it looked to me like it would go better with something a little bit slimmer. More on the pants in a minute...

This is a super easy pattern. There is only one pattern piece- the front and back are cut as one big piece that folds over the shoulder and is seamed together at CF and CB. It takes quite a bit of fabric, though. I made a size 44 and it took all of my 2 yards of fabric.
And speaking of fabric, this is cotton interlock from Hancock's. It's a little on the heavy side, but I wanted the shirt to have some weight to it and not get hung up on the pants. I also wanted it to keep me comfortable (warm) in my meat locker office.

I thought about grading down to a 42 above the bust, but I decided not to. 1.) I sometimes have problems with Burda patterns with cut on sleeves and I didn't want it to be too tight. 2.) I was too lazy. I figured it would be easy to take in if needed.

The top turned out HUGE. Voluminous doesn't even begin to describe it! I didn't need to worry about anything being too tight. These pictures were taken after I removed a total of 8 inches from the circumference! I took the side seams in a whole inch from wrist to hem and the CF and CB seams as well. These adjustments not only took the top down to a more pleasing proportion, but taking the CF and CB in also narrowed the neckline. I would have had visible bra straps otherwise.

Unfortunately, the adjustments to CF and CB also altered the hem slits. Mine are much more shallow than the model photo.
As you can see, the top is still pretty loose and breezy even with the amount of fabric I removed with my adjustments. It's comfortable and feels good to wear. I could almost see making it again- maybe even straightening the hem out to make a swing dress... Or shortening it to hip length and using a snuggly fleece fabric for colder weather.
About the pants...

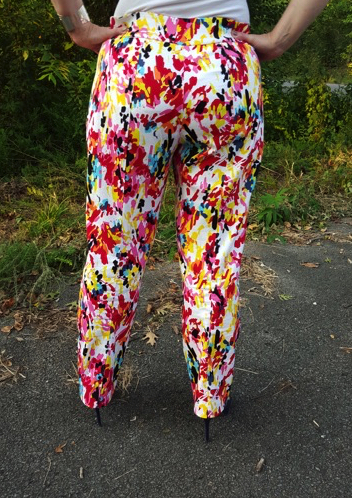
I've had my eye on pants #144 from the plus section of the June 2013 issue for a while now. They are simple, with a slim, streamlined silhouette, and I thought they would pair well with the big shirt.

For my version, I used this stretch twill print from Hancock's. I was so excited to get this fabric- I saw it a few months ago when it came out with the spring suitings, but at $17.99/yard, it was too expensive for me to buy just to stash it. I decided it would work for these pants and when I went back to get it, I was happy to see it with a 30% off sign on the table. I was even more thrilled when I asked the clerk to check the price and it had gone down to $5.99/yard!

I cut a 44 waist and eased out to a 46 at the hip. A quick and dirty muslin told me that I needed to remove 1/2" from the waist at CB and I needed an "FBA"- full bum adjustment, which I did by adding 3/8" of length across the backside tapering to nothing at the side seams. (Kind of like a princess FBA, but across the bum instead of the bust. The seams in the back made it super easy.) The fit wasn't perfect- there were a few wrinkles. I could have spent many more hours and a couple more muslins perfecting the fit, but I decided to just go for it. My body is still changing with my more active lifestyle and I figured in a couple of months these wouldn't fit any more anyway.
That was 2 weeks ago. They are loose already.
I'll just take the sides in a little on the next pair- oh yes, there will be a next pair! I've already ordered the fabric!

I'm happy with this top and the pants. It's kind of a different look for me, but I like it. Both pieces wore well and were comfortable all day. The top will pair well with jeans and will be a practical piece moving into fall. The pants will also work well with other items in my wardrobe and I anticipate plenty of wear from them as well. (Once I take them in a bit.) I also think this could become a TNT pants pattern for me with a little bit more tweaking.
And now I'm off- the September Burda came today and I need to go check it out while I unwind and get ready to fall asleep. Happy Sewing!


