Saturday, June 28, 2014

Plans Interrupted

So a few posts back I announced that I wanted to make the Asymmetrical Dress from the May 2014 Burda Style.  I even blogged the fabrics that I ordered from Fabric.com.  Well, those fabrics arrived right before I went out of town on a business trip, and as I feared, they weren't exactly what I thought they would be.  Don't get me wrong, they are all great on their own and I will use them all...  Just not as I had planned.


Here is the combo I ordered for the dress.  The red pique is gorgeous!  It's a bright, saturated red with a fabulous texture and a little bit of stretch.  I'm seriously thinking about ordering more in a different color(s!)

It's the knit that is the problem.  It doesn't go with the red.  I expected a little bit of color variation, after all they are two completely different fabric types which take dye differently, even if they had used the same dye, which I am pretty sure they didn't.  But the "red" in the knit print is much closer to pink.  Even though I am okay with the colors not being "matchy matchy" it's just too great a color difference to look right to me.  Sigh...

Lucky for me, I ordered a back-up:


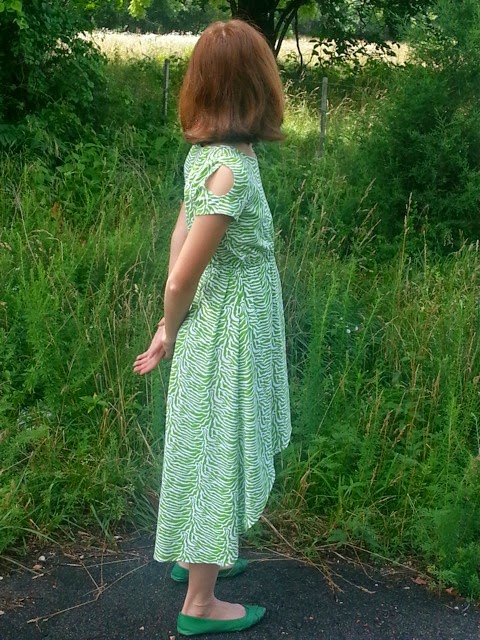
This knit is from the same line, but a different print with different colors.  It's not quite as contrasty and exciting as the first print would have been, but the colors go with the pique better.  There is green in it as you can see in the photo above, but not as much green, as you can see below (different part of the fabric.)


I did order a little extra, so I may be able to cut strategically to get the best contrast.  I'll have to see when I lay it out.  And the first knit fabric?  I think it will make a cute top for me or maybe a cute dress for the Princess.

So fabrics are here, and even though I'm going with plan B, I'm still procrastinating.  I am still trying to shed some winter pudge before I cut and sew a fitted sheath dress with a side zipper that will be hard to take in, so it may be another couple of weeks before I actually cut this out.  In the meantime, if you've made this dress or know someone who has, please share a link.  I'd love to see it!

Sunday, June 22, 2014

New Look 6297

Here is another little project that rolled out of the sewing room this week.  New Look 6297 in lime green zebra print for the Princess:


I found this pattern recently and snapped it right up.  New Look so rarely makes anything for "tweens" and I thought the Princess would love this dress.  Just as I suspected, she went right to View C with the mullet skirt and the shoulder cut-outs.


We used a lime green zebra print knit from Hobby Lobby.  This fabric has been around for a few years and I bet they carry it for a while yet.  I used the same print a few years ago for a top for me, and the hot pink color way for a halter dress for the Princess.  She prefers the green- lime is her favorite color.


I used the size 14 per the waist and hip measurements.  The Princess actually measured at a size 12 through the bust, but I decided to use the 14 just to give her some extra growing room and I'm so glad I did.  I don't think the 12 would have fit.


I added 5/8" extra length to the bodice and increased my waist seam allowance to 1" because there is a waist casing and I wanted to make sure I could use some substantial elastic there.  Other than that, I made no changes to the pattern.


The neckline is finished with a band made of the same fabric as the dress.  It's folded in half and stitched to the right side of the bodice.  Then the band is pressed out and the seam allowances are topstitched to the bodice.  It's a quick and easy finish that looks quite nice on the outside.


The sleeves had me worried- I wasn't looking forward to finishing that tiny cut-out.  But the pattern is actually pretty creative.  Each sleeve is two pieces.  You do have to do a tiny 3/8" finish on the cut-out, but it's in 2 pieces so that makes it easier.  (I found that clipping the seam allowance helped a lot.)  Then you stitch the sleeve together at the bottom below the cut-out, and the top overlaps at the shoulder.

New Look would have you stitch the inner sleeve seam and then set the sleeves into the bodice, but I sewed them in flat and then sewed up the side seams from hem to sleeve hem- so much easier!


With the mullet skirt you do see the wrong side of the fabric so I serged my side seams and did a very neat 5/8" hem.  In this fabric, I think it's okay.  The hem is curved, but it's pretty gentle so I had no problems getting my hem to lie flat.

I think the dress turned out super cute and the Princess loves it.  It was pretty quick to cut and sew and it's completely age appropriate, so if you have a young lady who needs a new dress this is a great pattern to try.  I'd love to make the sleeveless version as temps are finally starting to rise here, or even the maxi version, but the Princess has said she doesn't want a maxi dress.

Up next is a project the Princess and I are working on together, plus a maxi dress for me.  More sewing soon...

Thursday, June 12, 2014

Simplicity 2369 New and Improved

Here is another finished project that rolled off the sewing table about a week and a half ago.  I had to wait for a sunny afternoon after I got home from my trip.  But here it is, finally, after a day of road testing.


This is Simplicity 2369, which I made once before back in the summer of knit dresses (2011.)  I love that dress and I still wear it, but not as often as I'd like because the fit is off.  I didn't know how to adjust for length through the torso without distorting the pleats and the sash at the waist so I just didn't do it.  And I'm very sorry I didn't. When I wear that dress I'm constantly tugging it down because it feels like the tie is right up under my bust- not comfortable!


Since making the last dress, I thought I'd figured out a way to adjust the length without affecting the front wrap.  So I decided to try it again.  I even went so far as to buy the Amazing Fit version, S1653, with a new dress in mind.  But when I opened the envelope and saw that the new version has a bust dart and a waist seam (hidden under the front wrap) I decided to just go with what already works, and I pulled 2369 out of the stash.


I used the same pattern pieces as before, the knee length skirt, and the short raglan sleeves, size 14 shoulders, and 16 from the bust down.  (Last time I had to take it in down the sides, but this time I'm still working off the winter pudge and the 16 was fine.)


My idea for the length adjustment was to simply slash the pattern across the waist, but angle the cut up above the pleats and slide the pieces apart.  Like so:


I added 1.5 inches of length at the waist, but because of the angled slash, it only added about 3/4" to the neckline edge.  I was able to easily blend it in and it didn't lower the crossover point much, if at all.  I moved the left side waist tie down 1.5" and the result is a wrap and tie that fits much more comfortably and looks much better without me having to constantly tug it into place.


My fabric is a poly knit from Joann.  It's a geometric design on a mottled field of purple, maroon, and gold.  It's a great weight and drapes beautifully.  It was also pretty easy to cut and sew with a stretch needle.  I used a straight stitch to baste my seams and then serged everything for security and neatness.  


I had no issues until I went to hem the dress by machine.  The hem wanted to roll out of place as it went under the presser foot and after 3 attempts complete with ripping out the stitches, I gave in and just hand hemmed.  It didn't take long because the skirt isn't very full, although, in my opinion, it has just the right amount of flare to be sort of disco fabulous.


I love this dress and I know I'm going to wear it a lot this summer.  I'll probably give this pattern a break for a while, but I may come back to it, or the 1653 version, because it has a long sleeve view which would be perfect for fall and winter.

In other news, I'm taking a much needed day off tomorrow.  Hopefully I can get started on the Burda Asymmetrical Dress and at least get a muslin done.  I also have some cute knits and a new dress pattern for the Princess.  We'll see if the weekend goes as planned...

Wednesday, June 11, 2014

Burda World of Fashion 07-2008-108

This top has been finished and waiting to be blogged for weeks.  I waited for just the right combination of sun, an available photographer, and time... and we got one shot before the camera said "memory card full."

So that's why I only have one photo.  I just gave up.


In any case, this is top #108 from the July 2008 issue of Burda world of Fashion (back before it was Burda Style.)  It's a simple tunic with a curved yoke and an inverted pleat.  Believe it or not, I've been wanting to make this top ever since the magazine came out almost six years ago.  I even went so far as to muslin it a few years back, but I didn't make it up at the time.  I can't remember now exactly why but I think it was because of fit issues through the upper bust/underarm area.

A few weeks back I dug it out and decided to give it another try.  I've been on a quest for easy tunic tops this year and this pattern seemed like it would be just the thing.  I had to re-trace and start over, but it's such a simple design that I didn't care.  I traced a 44 and tapered out to a 46 at the hip.  I didn't try to start with a 42 at the shoulder and I didn't make my normal petite adjustment because it always seems like I need the extra room with Burda's cut on sleeve patterns.  Maybe it's because my upper arms are chubby.  I raised the neckline 1/2"and lowered the top of the side seam the same amount.  A quick muslin seemed fine- the neckline was a bit wide, but I figured I could just take a smaller seam allowance and bring it in just a bit.  I had some drag lines in the back which seemed to indicate the back was too long.  So I shaved 1/4" off the top of the back bodice tapering to nothing at the side seam.

For the actual top, I omitted the pockets and the center back zip.  I cut the back yoke on the fold.  The neckline is plenty wide enough to go over my head without a zipper and the top is loose enough that I have no problems getting in and out of it.  The center back seam does have some subtle shaping so I kept that and I did make the vertical darts in back.  I also used stay tape to reinforce the top of the side seams.  That area gets a lot of stress and I didn't want it to rip during wear.


My fabric is a linen rayon blend purchased specifically for this project from Joann.  It's a gorgeous emerald green with a windowpane design woven into it.  I washed it in hot water and dried it on the highest setting to preshrink it.  It does wrinkle, but a short trip through the steam refresh cycle in the dryer perks it right up and smooths it out nicely.

I'm quite happy with the finished top, however, I do have a few quibbles.  The neckline is still too wide for my taste.  It just barely covers my bra straps.  That could be easily fixed, though.  The top has plenty of room through the hips, but it hits me right at the top of my thighs so when I sit down, wrinkles form across my lap.  You can just see them starting to appear in the photo above.  I like the length, so perhaps a different fabric would work better.  I also still feel like I need more room to move through the upper bust/underarm area.  I think I need to drop the side seam down another half inch or so.

So maybe I need to make this again.

In other news, I have not started on the Asymmetrical Dress.  The fabric arrived right before I headed out of town on a business trip.  Now that I'm back, I see that the print fabric doesn't quite match the solid red fabric.  Good thing I ordered a back-up!  More on that project later...